Antler Plaque – Do It Yourself!
If any of you guys are like me you’ll be walking around a rustic furniture store with your wife and she’ll comment “Wow, I really like that!” This is usually when I pipe up and say, “Oh yeah, I could make that really easily.” We both know that I probably couldn’t and that if I could, it wouldn’t be really easy, but it makes me feel better and I get the much anticipated eye roll which makes it all worth it 😉 Surprisingly, there are projects that I do follow through on and every once and awhile I’ll surprise myself at the results.
This last little project I wanted to share with you all was mounting my antlers (from the buck I shot bowhunting this year – scroll down for video!) on a plaque. I looked at several online and some were nice, but were either more money than I wanted to spend or just didn’t have the “look” I wanted. I wanted an arrowhead plaque to let everyone know that this was a bow kill. So I decided that I would just make it.
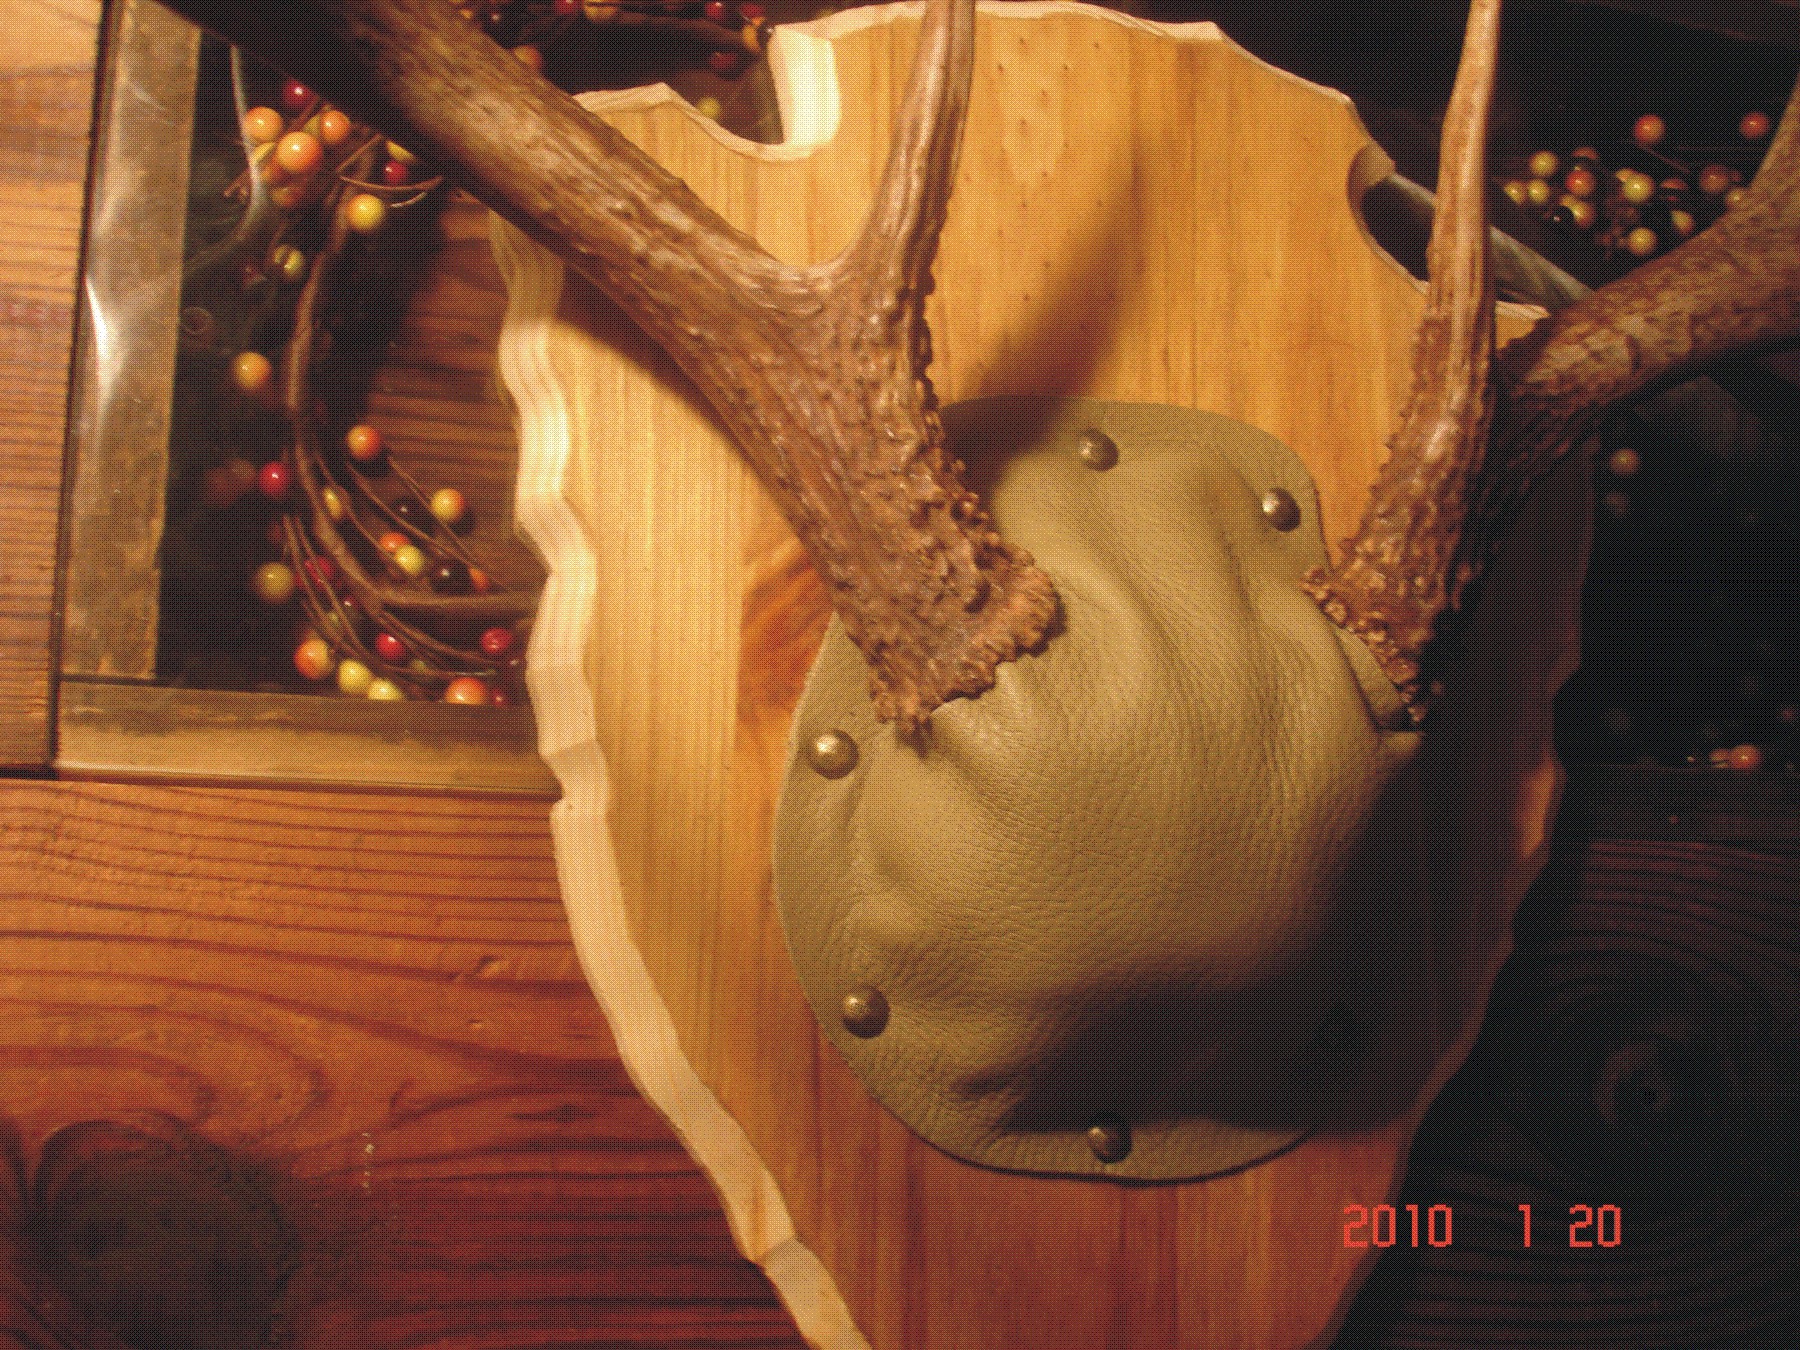
I started with a pattern that I printed out onto a few different sheets of copy paper and taped them together to complete the arrowhead outline. I then transposed that pattern onto a nice 1″ board that I purchased at Lowes for around $8. I then cut out the arrowhead with a jig saw. I would imagine a band saw would be faster, but when you don’t have a band saw you use a jig saw! I then took my router that I had never used and cut a 45 degree angle about 1/2″ deep giving it that true arrowhead look. I bought some wire strap from a hardware store for about $2, some 1″ sheet rock screws and some stain for $6. Of course, I could do several of these plaques with these supplies I’m listing. I also bought a nice 12″x12″ piece of leather, some decorative tacks, and mounting hardware from Hobby Lobby all for $9.
After cutting out the plaque and routing the edge I stained the face of the plaque leaving the edges the natural wood color. Then of course, I simply strapped the antlers to the plaque. Now this is my first try at this and I needed something to give me some shape for the leather to go over and I used what was handy which happened to be my kid’s play-do. This may turn out to be a mistake after this stuff dries out, but we’ll have to see. I used some felt to make myself a pattern to use to cut out the leather with. I then simply tacked the leather down around the the antlers as you can see.
This project didn’t take too long and my wife said that she thought it looked great so it must, as she is very honest when it comes to my craftmanship whether it be good or bad 😉 Plus I have that manly, “I made that” feeling and that’s worth quite a bit!! Below are some pics of the finishing steps to the process.


There are 3 Comments to "Antler Plaque – Do It Yourself!"
What software did you use to print the pictures out? word? and how did you print it out to be able to tape them together. because when i try one side keeps being bigger then the other!!
I used coreldraw which is a design program. It might still work in word or paint, but make sure your printer isn’t set to “fit to page”. The setting needs to be “no scale” or something similar.
I’m not very efficient in word, so hopefully this helps. Let me know if this helps, if not I’ll try and get you the right answer.
Good luck!
Nathan
ohh got it thanks a lot!!!